
Voltrix TerrainMaster Assembly Guide: Build Your Child’s 4x4 Adventure!
Ready to get your child’s 24V 4x4 set up for backyard adventures? This Voltrix TerrainMaster assembly guide breaks the build into clear stages, so you can check the parts, follow the instructions and prepare the vehicle for its first ride.
It’s sensible to double-check the components and take care around the battery. A methodical build helps you catch issues before your child climbs aboard. Use this guide alongside the manufacturer’s instructions, which are the final reference for assembly and operation.
The TerrainMaster includes features such as a parental remote override, overload protection and a UL 2272-certified battery. Take your time, keep the instructions close and complete the checks before the first ride. Here’s how to get the 4x4 ready for outdoor play.
Key Takeaways
- Work through the Voltrix TerrainMaster assembly guide in order, using the supplied instructions as your final reference.
- Prepare a clear, flat workspace and check the supplied parts before you start, so you can spot anything missing early.
- Fit the axles, motors and wheels carefully, then match the motor leads to the control box as shown in the instructions.
- Before the first ride, check the wheel nuts and test the braking response as directed in the manual.
- Follow the battery-care and cleaning instructions to keep your TerrainMaster ready for outdoor play.
Unboxing Your Voltrix TerrainMaster: Pre-Assembly Essentials
A little preparation makes the build easier. Choose a wide, flat space with enough room to lay out the parts and move around the vehicle. Keep small parts away from children and pets while you work. Before assembly, check the TerrainMaster instructions and parts list so you can identify any missing or damaged components before you begin.
Keep the box nearby if you need a temporary prop during early assembly. Use it only if it is stable and the vehicle is securely supported. Don’t rely on a loose or shifting carton to hold the vehicle in place.
Tools You Will Need
Have these items within reach before you start:
- A standard Phillips head screwdriver.
- A spanner or socket set for the wheel nuts. Check the instructions for the correct fit rather than forcing a tool that doesn’t match.
- Scissors for carefully snipping internal zip ties. Keep the blades clear of wires, components and the vehicle body.
Keep your tools in one place as you work. An organised workspace makes small parts easier to track.
Inventory Check: What Is in the Box?
Unpack the components gently and compare them with the supplied instructions or packing list. Check for the main vehicle body, four drive motors, wheels and steering assembly. The listed setup also includes a pre-installed 24V battery, steering wheel and parental remote override handset. Confirm these parts are present before moving on.
Set the small parts bag somewhere easy to see. It contains screws and washers needed during assembly, so check the packaging carefully before you discard it. If a part appears to be missing or damaged, pause and consult the packing list and product support information. Don’t substitute unrelated screws or washers.
This is the practical starting point for your Voltrix TerrainMaster assembly guide. Group the wheels together, keep the motors and steering parts separate, and leave fasteners in their bag until a step calls for them. With the parts checked and the workspace clear, you’re ready to begin the build.
Step-by-Step Voltrix TerrainMaster Assembly Guide
Follow the supplied instructions for the correct orientation and fasteners at each stage. The sequence below outlines the build, but your product manual is the final reference if a step or component differs. Keep the vehicle switched off while assembling and handle the wiring gently.
Fit the Axles, Motors and Wheels
Support the body securely and position it as directed in the manual. Fit the front and rear axles first, checking that each is seated in the correct position before fastening it. Next, slide each motor onto its axle, keeping the lead clear of moving parts. Work on one wheel at a time so you can check each connection before moving on.
- Line up the motor gear with the wheel hub as shown in the instructions. It should sit neatly, not at an angle.
- Fit the supplied washers in the specified order to help prevent the wheel from rubbing against the frame.
- Secure each wheel with its locking nut. Tighten it until the wheel is held firmly, then check that it can still spin freely.
Use a tool that fits the supplied hardware. If a wheel binds or feels loose, stop and recheck the washer and nut placement rather than forcing it.
Install the Steering and Dashboard
Once the wheels are fitted, attach the steering column as directed in the manual and connect the steering wheel plug to the matching main harness connector. Guide the column into the front axle linkage and secure it as instructed. Keep wires clear of joints and edges as you position the parts. A pinched or strained lead can be damaged.
Connect the dashboard components and click them into place, then mount the seat. Before tightening the final screws, check that plugs are fully seated and wires aren’t trapped beneath the dashboard or steering column. If your model’s dashboard has horn and light switches, test them as directed before fastening everything in place. For context, the federal requirements for electrically operated toys are United States regulations, not a substitute for the TerrainMaster’s assembly instructions or Australian product information.
Take this part of the Voltrix TerrainMaster assembly guide one connection at a time. For product details to refer to alongside your manual, visit Hoveroo’s Voltrix TerrainMaster information.
Wiring Your Ride: Battery and Motor Connections
Check electrical connections carefully before your child’s first ride. Keep the vehicle switched off and unplugged from its charger while you work. Follow the supplied manual for connector locations and sequence. If a connector, wire colour or control box lead doesn’t match the instructions, pause and check the product information rather than guessing.
Connect the Motors and 24V Battery Safely
Find the motor leads and control box, then match each plug to the corresponding lead as shown in the manual. Check the colour coding and connector shape before joining them. Press connectors together gently and securely. Never force a plug or pull on its wires.
The 24V battery is beneath the seat, according to the assembly information for this guide. Before connecting it, check the manual for the specified terminal and connector. Remove any protective cover only as directed, and make sure the connection is secure without touching exposed metal. Check that the overload protection component is in place if your instructions identify one. If anything looks damaged or doesn’t fit, stop and consult the product support information.
Route the wires through the intended channels, keeping them clear of wheels, axles, steering parts and other moving components. Don’t trap wires beneath the seat or body panels when fastening them.
Pair and Check the Parental Remote Override
The parental remote override is included with the TerrainMaster. Insert batteries into the handset as directed, then follow the supplied instructions to pair and test it. The pairing sequence can vary, so don’t rely on an unverified button combination. If the manual describes an emergency stop or override test, carry it out with the vehicle stationary and the area clear. Confirm the control works before your child rides.
The U.S. Consumer Product Safety Commission explains its toy safety requirements. This is a United States reference, not Australian guidance or a substitute for the TerrainMaster’s instructions.
Charge Before the First Test Drive
Use the supplied charger and follow the manual’s directions for the initial charge. Don’t assume a charging time or leave charging unattended if the instructions advise otherwise. Choose a dry, well-ventilated charging spot away from direct heat, and follow the battery-care guidance supplied with your ride-on.
Before switching on, check that connections are seated, wiring is clear of moving parts and the seat is secure. This completes a key part of your Voltrix TerrainMaster assembly guide and prepares you for the pre-ride checks.
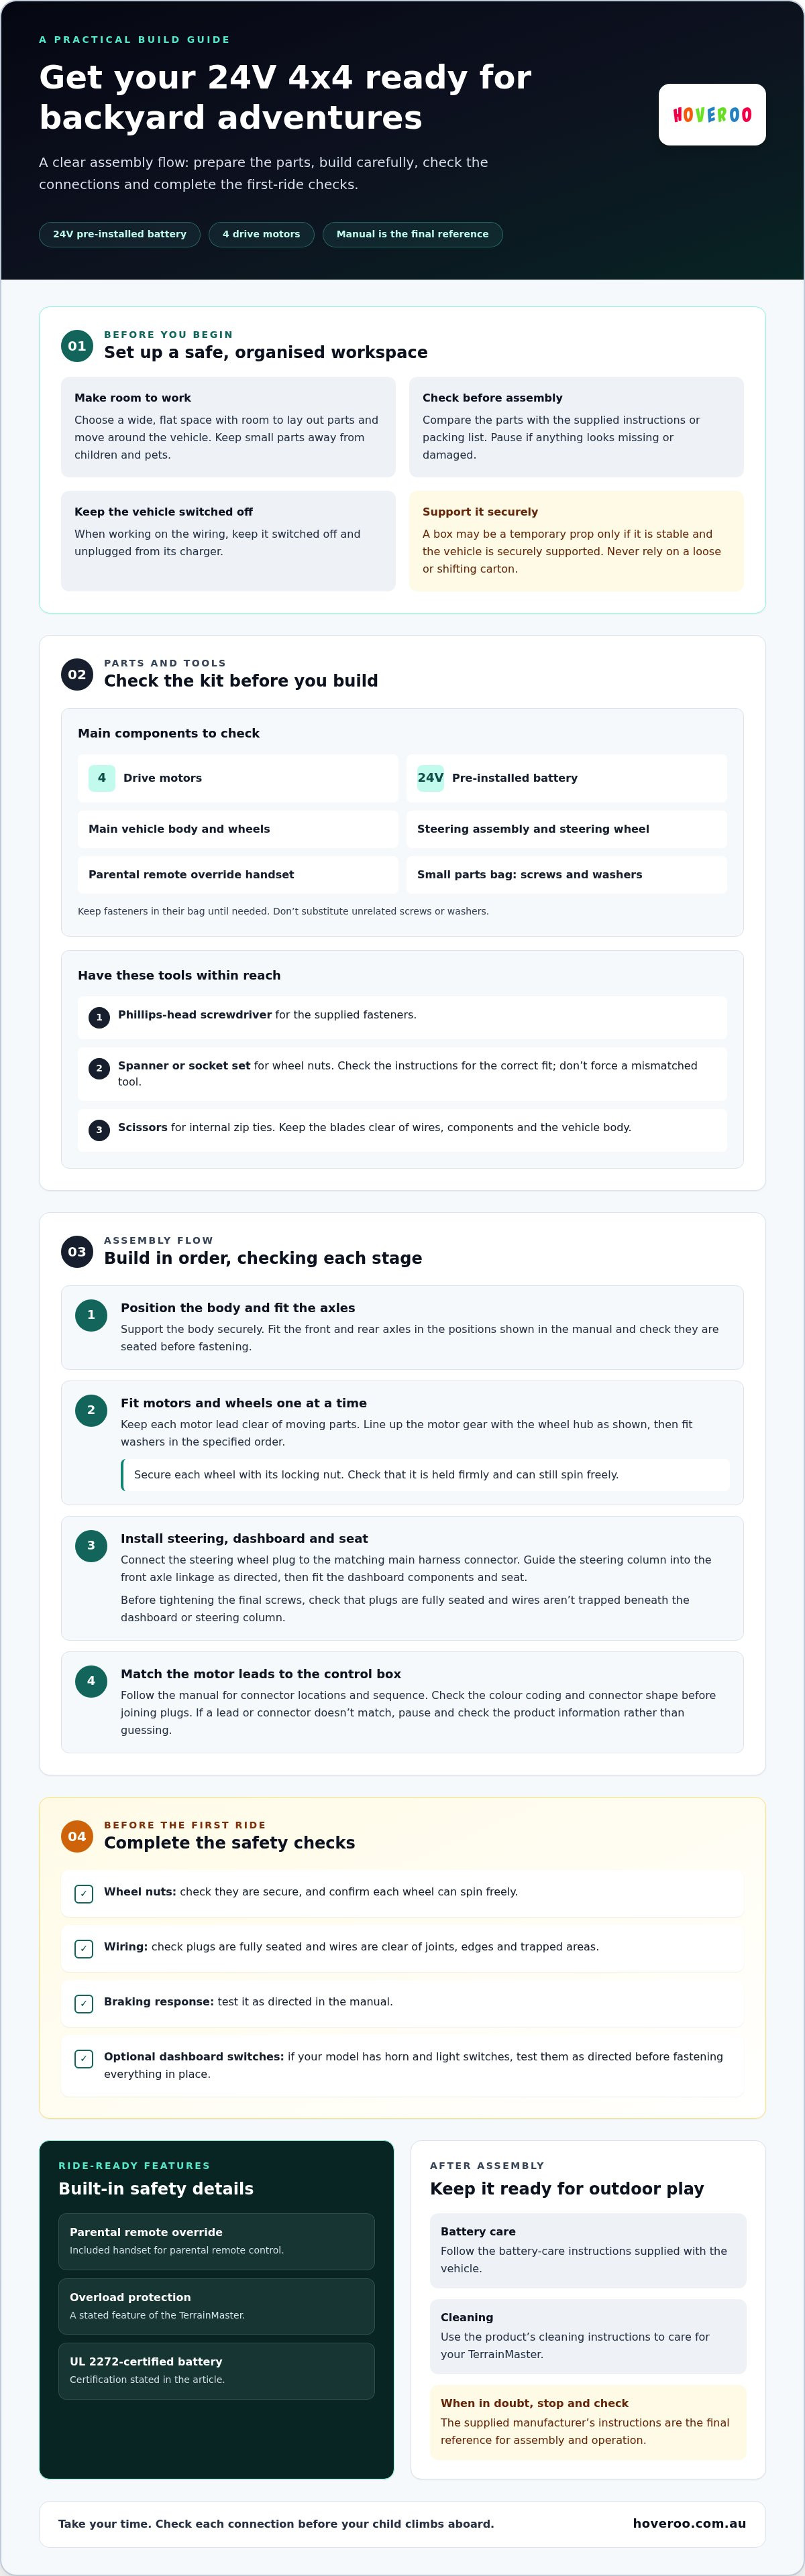
The Parental Peace of Mind Checklist: Safety First
Before your child climbs aboard, check the build and the ride-on’s controls. Use the supplied manual for the correct operating steps and limits. These checks complement assembly; they don’t replace adult supervision, a properly fitted helmet or a suitable riding area.
- Check the wheels: Make sure each wheel nut is secure and each wheel turns freely. Check the nuts after the first short test only if the manual recommends it, and follow its instructions for tightening.
- Test the brakes: With the vehicle stationary and the area clear, check the braking response as described in the manual. If your model has auto-lock braking, confirm it engages when you release the pedal.
- Adjust the restraint: If your TerrainMaster has a seatbelt, adjust it to fit your child as directed. Secure it correctly before every ride.
- Choose a suitable speed: If the vehicle has a dual-speed system, select “Low” for a beginner when the manual recommends it.
Keep your child within the TerrainMaster’s stated maximum rider weight. Check the product label or manual for the limit, and don’t exceed it.
Check Overload Protection and Motor Response
The TerrainMaster includes overload protection. It helps prevent the battery from being drawn beyond its safe current limit, but it doesn’t guarantee protection against motor damage on steep inclines. During a cautious, adult-supervised test on a flat, clear surface, listen for unusual sounds and check that the vehicle responds as described in its instructions. Stop if you notice a problem and inspect the setup before riding again.
Finish with a Gear and Control Check
Fit your child with a properly fitted helmet before each ride. If your TerrainMaster has a built-in Bluetooth speaker, keep the volume low enough for your child to hear you. Test the parental remote override according to the manual, with the vehicle stationary and the riding area clear. The UL 2272-certified battery and overload protection are useful safety features, but they don’t replace these checks or adult supervision.
For more family-focused pointers, read the 24v ride on 4x4 australia guide. Keep this Voltrix TerrainMaster assembly guide handy for your final checks, then review the vehicle’s instructions before every ride. To browse product details, visit Hoveroo’s ride-on range.
Ready to Rip? Maintenance for Years of Fun
A few simple habits can help keep your TerrainMaster ready for more backyard adventures. After each outing, check the wheels and visible wiring, clear away dirt, and look for anything loose or damaged. If you spot an issue, pause play and follow the product manual for next steps.
Care for the 24V Battery
Follow the charging instructions supplied with your ride-on. Use the charger specified by the manufacturer, connect it as directed and observe the recommended charging time. Don’t follow a fixed routine, such as charging for a set number of hours after every session, unless the manual calls for it. Avoid leaving the 24V battery discharged for an extended period, and follow the manufacturer’s advice for storage during a break in play.
Choose a dry, well-ventilated charging spot away from direct heat and moisture. Keep the charger and battery away from water, and don’t charge if either appears damaged. Check the manual if you’re unsure.
Clean and Store Your 4x4
Regular cleaning makes it easier to inspect the vehicle and its moving parts. Wipe the body with a damp cloth, then dry it before storage. Never clean the vehicle with a hose. Water can reach electrical components. Keep the TerrainMaster in a dry, undercover spot, out of direct sun and away from rain. Shade also helps protect the body’s colour from fading.
After a ride on gravel or dirt, check around the wheels and visible motor connections for dust or debris. Don’t pull apart electrical connections to clean them. Follow the manual and keep the vehicle switched off while checking. The TerrainMaster’s tyres are specified as EVA rubber, so inspect them for visible wear or damage and refer to the product instructions for care. They aren’t air-filled tyres, so don’t attempt to inflate them.
Use this care routine to round out your Voltrix TerrainMaster assembly guide. Regular checks help you spot issues early and get the ride-on ready for the next session. Looking for another backyard ride-on adventure? Explore the kids electric dirt bike guide for more ideas.
Get Set for Backyard Adventures
Your TerrainMaster is ready for its next step: a careful final check, a supervised first ride and regular care between adventures. This Voltrix TerrainMaster assembly guide takes you through the build, connections and key checks before your child takes the wheel.
Before riding, follow the manual to check the wheels, braking response and parental remote override. Make sure your child wears a properly fitted helmet, stays within the vehicle’s maximum rider weight and rides in a suitable area under adult supervision. The UL 2272-certified battery and design for Australian backyard conditions add reassurance, but they don’t replace safe checks and supervision.
Follow the manufacturer’s charging and care instructions. Wipe the 4x4 clean, store it undercover and check it before each outing. Ready to explore the ride-on? Discover the Voltrix TerrainMaster and get set for more outdoor play.
Frequently Asked Questions
How long does it take to assemble the Voltrix TerrainMaster?
Hoveroo describes the TerrainMaster as having a simple assembly process that takes under 30 minutes. Your actual time may vary depending on your experience, workspace and whether the parts and tools are ready. Read the instructions first, lay out the components and follow the steps in order. Allow time for careful checks, especially for wheel fittings and wiring, rather than rushing to finish.
Can I assemble the 4x4 by myself or do I need help?
You may be able to assemble it alone by following the supplied instructions, but a second adult can help steady the vehicle body while you fit parts. Don’t lift or balance the vehicle in a way that feels unsafe. Use a stable, flat workspace, keep children away from loose parts and tools, and follow the manual’s guidance for positioning and supporting the 4x4 during assembly.
How do I know if the 24V battery is fully connected?
With the vehicle switched off, check the battery connection under the seat against the manual’s instructions. The plug should be seated securely, with no visible gap or strained wires. Some connectors may click into place, but use that as a check only if the manual says to expect it. Don’t tug on the wiring. If the connector doesn’t fit or looks damaged, stop and seek product support.
What should I do if the parental remote override isn’t pairing?
Check that the handset has fresh batteries installed in the correct direction, then follow the pairing sequence in the TerrainMaster manual. Make sure the vehicle is switched on as instructed and that you’re using the correct pairing control. Don’t guess at button combinations, as the process can vary. If it still won’t pair, switch the vehicle off and consult the product support information before allowing your child to ride.
Is the Voltrix TerrainMaster waterproof for backyard puddles?
Don’t assume the TerrainMaster is waterproof or ride it through puddles. The supplied information doesn’t confirm a waterproof rating, and water can affect electrical parts. Keep the vehicle away from standing water and wet conditions. For cleaning, switch it off and wipe the body with a damp cloth, as directed in the care guidance. Don’t use a hose, and let the vehicle dry before storing it undercover.
How often should I tighten the wheel nuts and bolts?
Check that the wheel nuts are secure after assembly and before your child’s first ride. The assembly checklist also recommends checking them after the first five minutes of use. After that, follow the manual’s inspection and tightening advice, and check for looseness or unusual wheel movement before rides. Use the correct tool and avoid overtightening, which may affect how freely a wheel turns.
What is the maximum rider weight for this electric 4x4?
The stated maximum rider weight for the Voltrix TerrainMaster is 100 kg. Check the product label or manual to confirm the limit for your exact model, and don’t exceed it. Weight is only one part of a safe ride. Make sure your child is supervised, wears a properly fitted helmet and uses the vehicle on a suitable surface, following the manufacturer’s instructions.
Why is my TerrainMaster not moving after I assembled it?
Start with the basics: check that the battery has been charged as directed, the vehicle’s power is on and the accelerator is being used according to the manual. Switch it off before inspecting the battery and motor plugs for loose connections. Check that wires aren’t trapped or damaged. If everything appears connected but the 4x4 still won’t move, stop troubleshooting and consult the product instructions or support information.